When did practical become such a bummer? Like it’s boring, uninspired and just not a cool thing to do? I see practicality in a completely different way. Practical choices offer freedom, they decrease stress, they make room for joy and beauty. I believe practical choices create space for the extra things in life to really be celebrated.
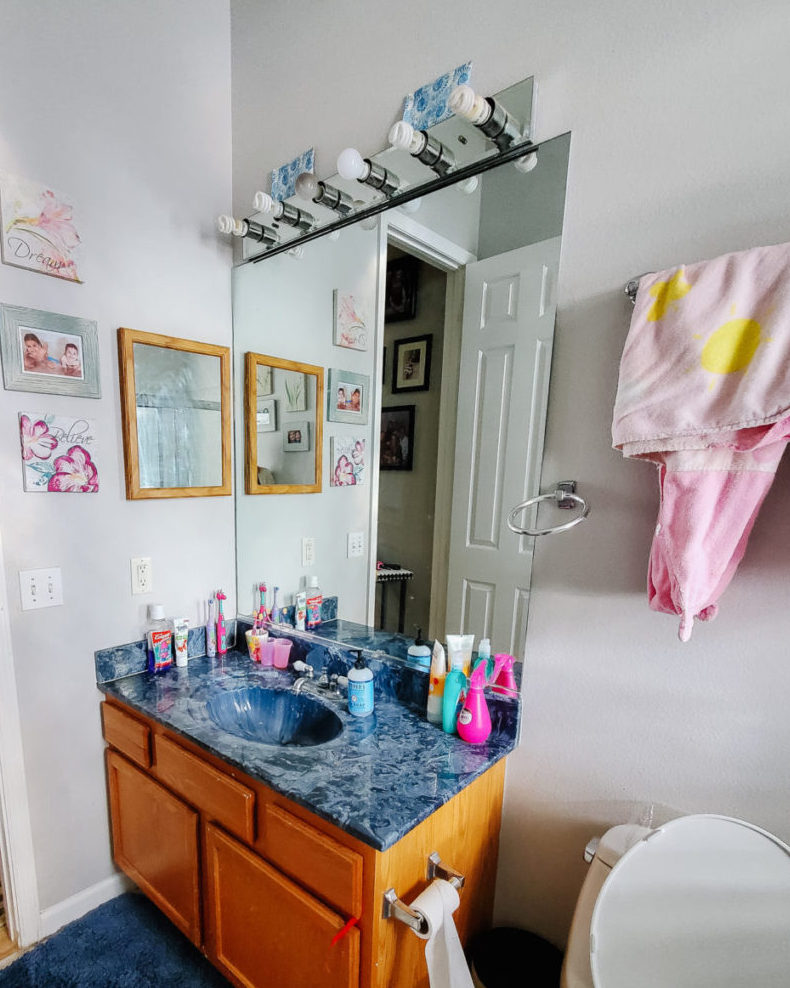
Take the Bald Eagle Run Girls Bathroom remodel for example. We started with a dated, builders grade bathroom with almost no storage. A room that did not serve the people who used it very well. And if there is one thing a home should do at all times- it should support the people who live in it.
Our goals for this project were to increase storage, maximize our dollars with thoughtful choices in new materials coupled with strategic use of existing materials — while creating something beautifully updated and appropriate for two growing girls. Definitely practical. Definitely not boring. Confession: I could feel the anxiety this room created for mom. It was not doing her any favors. Little things: like picking hand towels up off the floor, kiddo stuff with no home- left to live scattered on the counter repeatedly getting knocked over, a poor/no location for fresh towels or even a kid friendly place for towels in use (where they can hang them up THEMSELVES). My goal was to solve for these issues in a graceful, cost effective way that I knew she would feel.
Every choice in this room was carefully made. Every one. If you’re not remodeling this way, you are wasting money. Now, that doesn’t mean you should trivail over your desicions- lucky for you, you have this site as a resource and we will arm you with the information you need to make the right choices for your situation and AVOID getting sucked into an search engine black hole.
This renovation cost about HALF what it would traditionally require and having clients who were handy, hardworking and invested was a key factor in the finished results and cost. Here’s how:
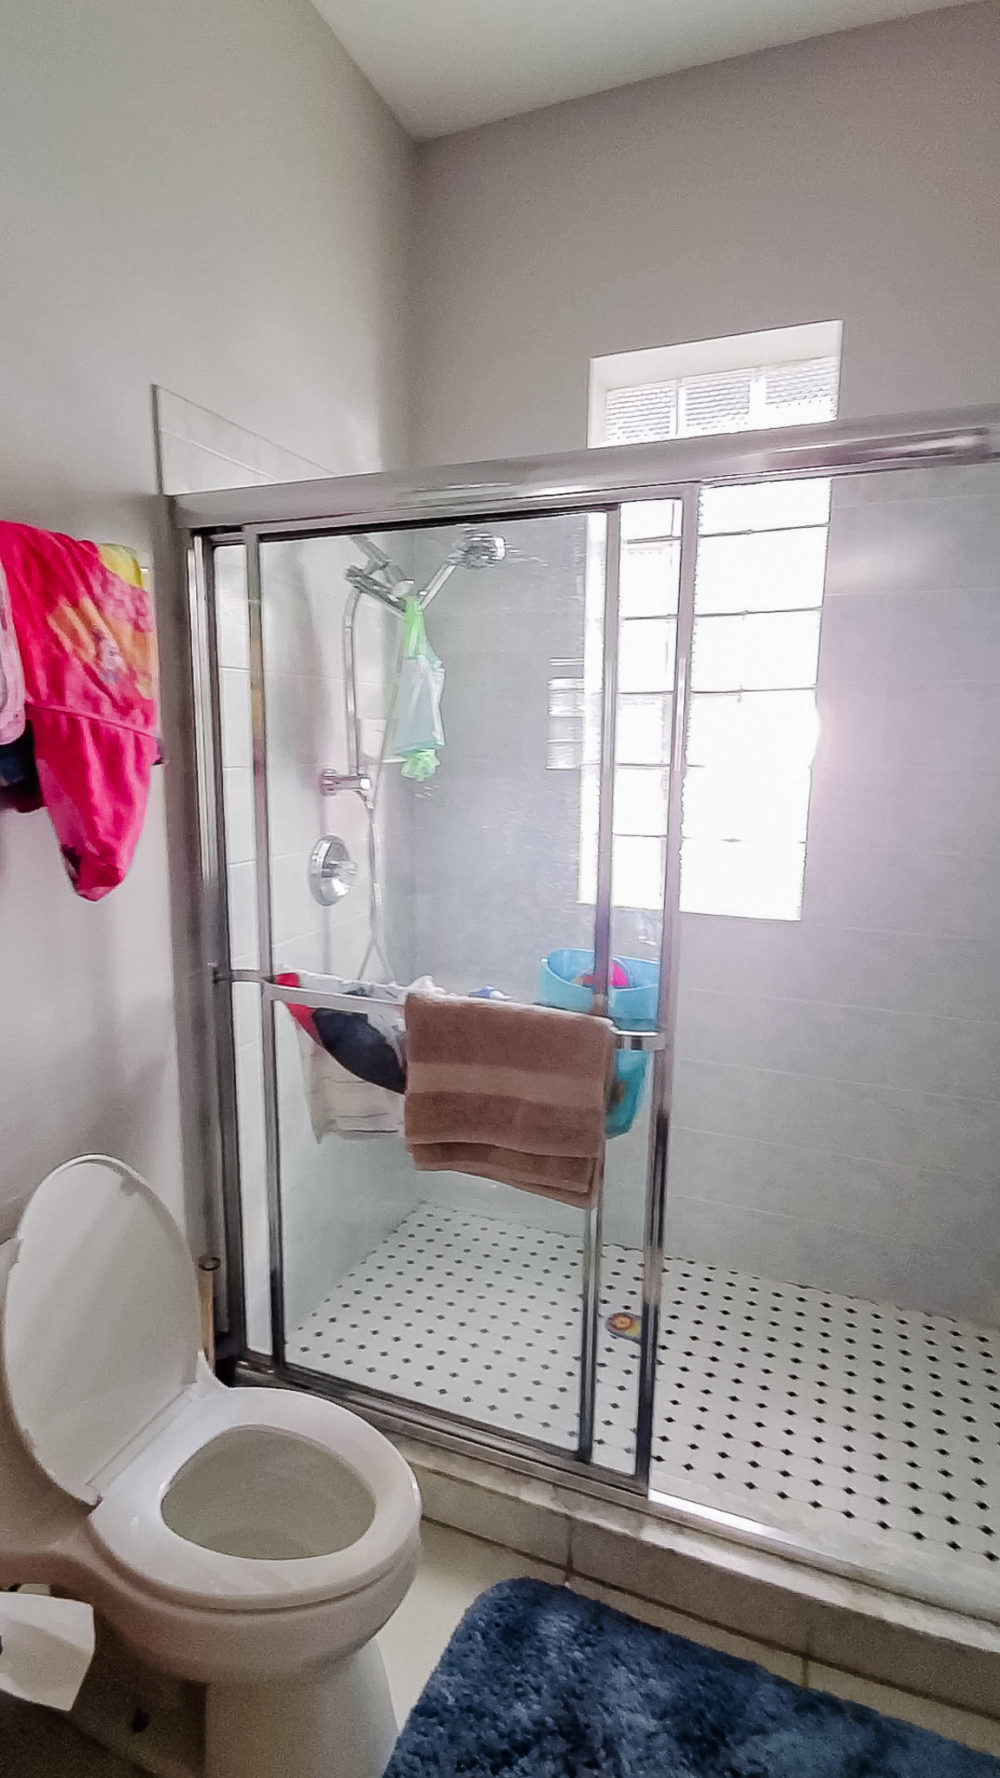
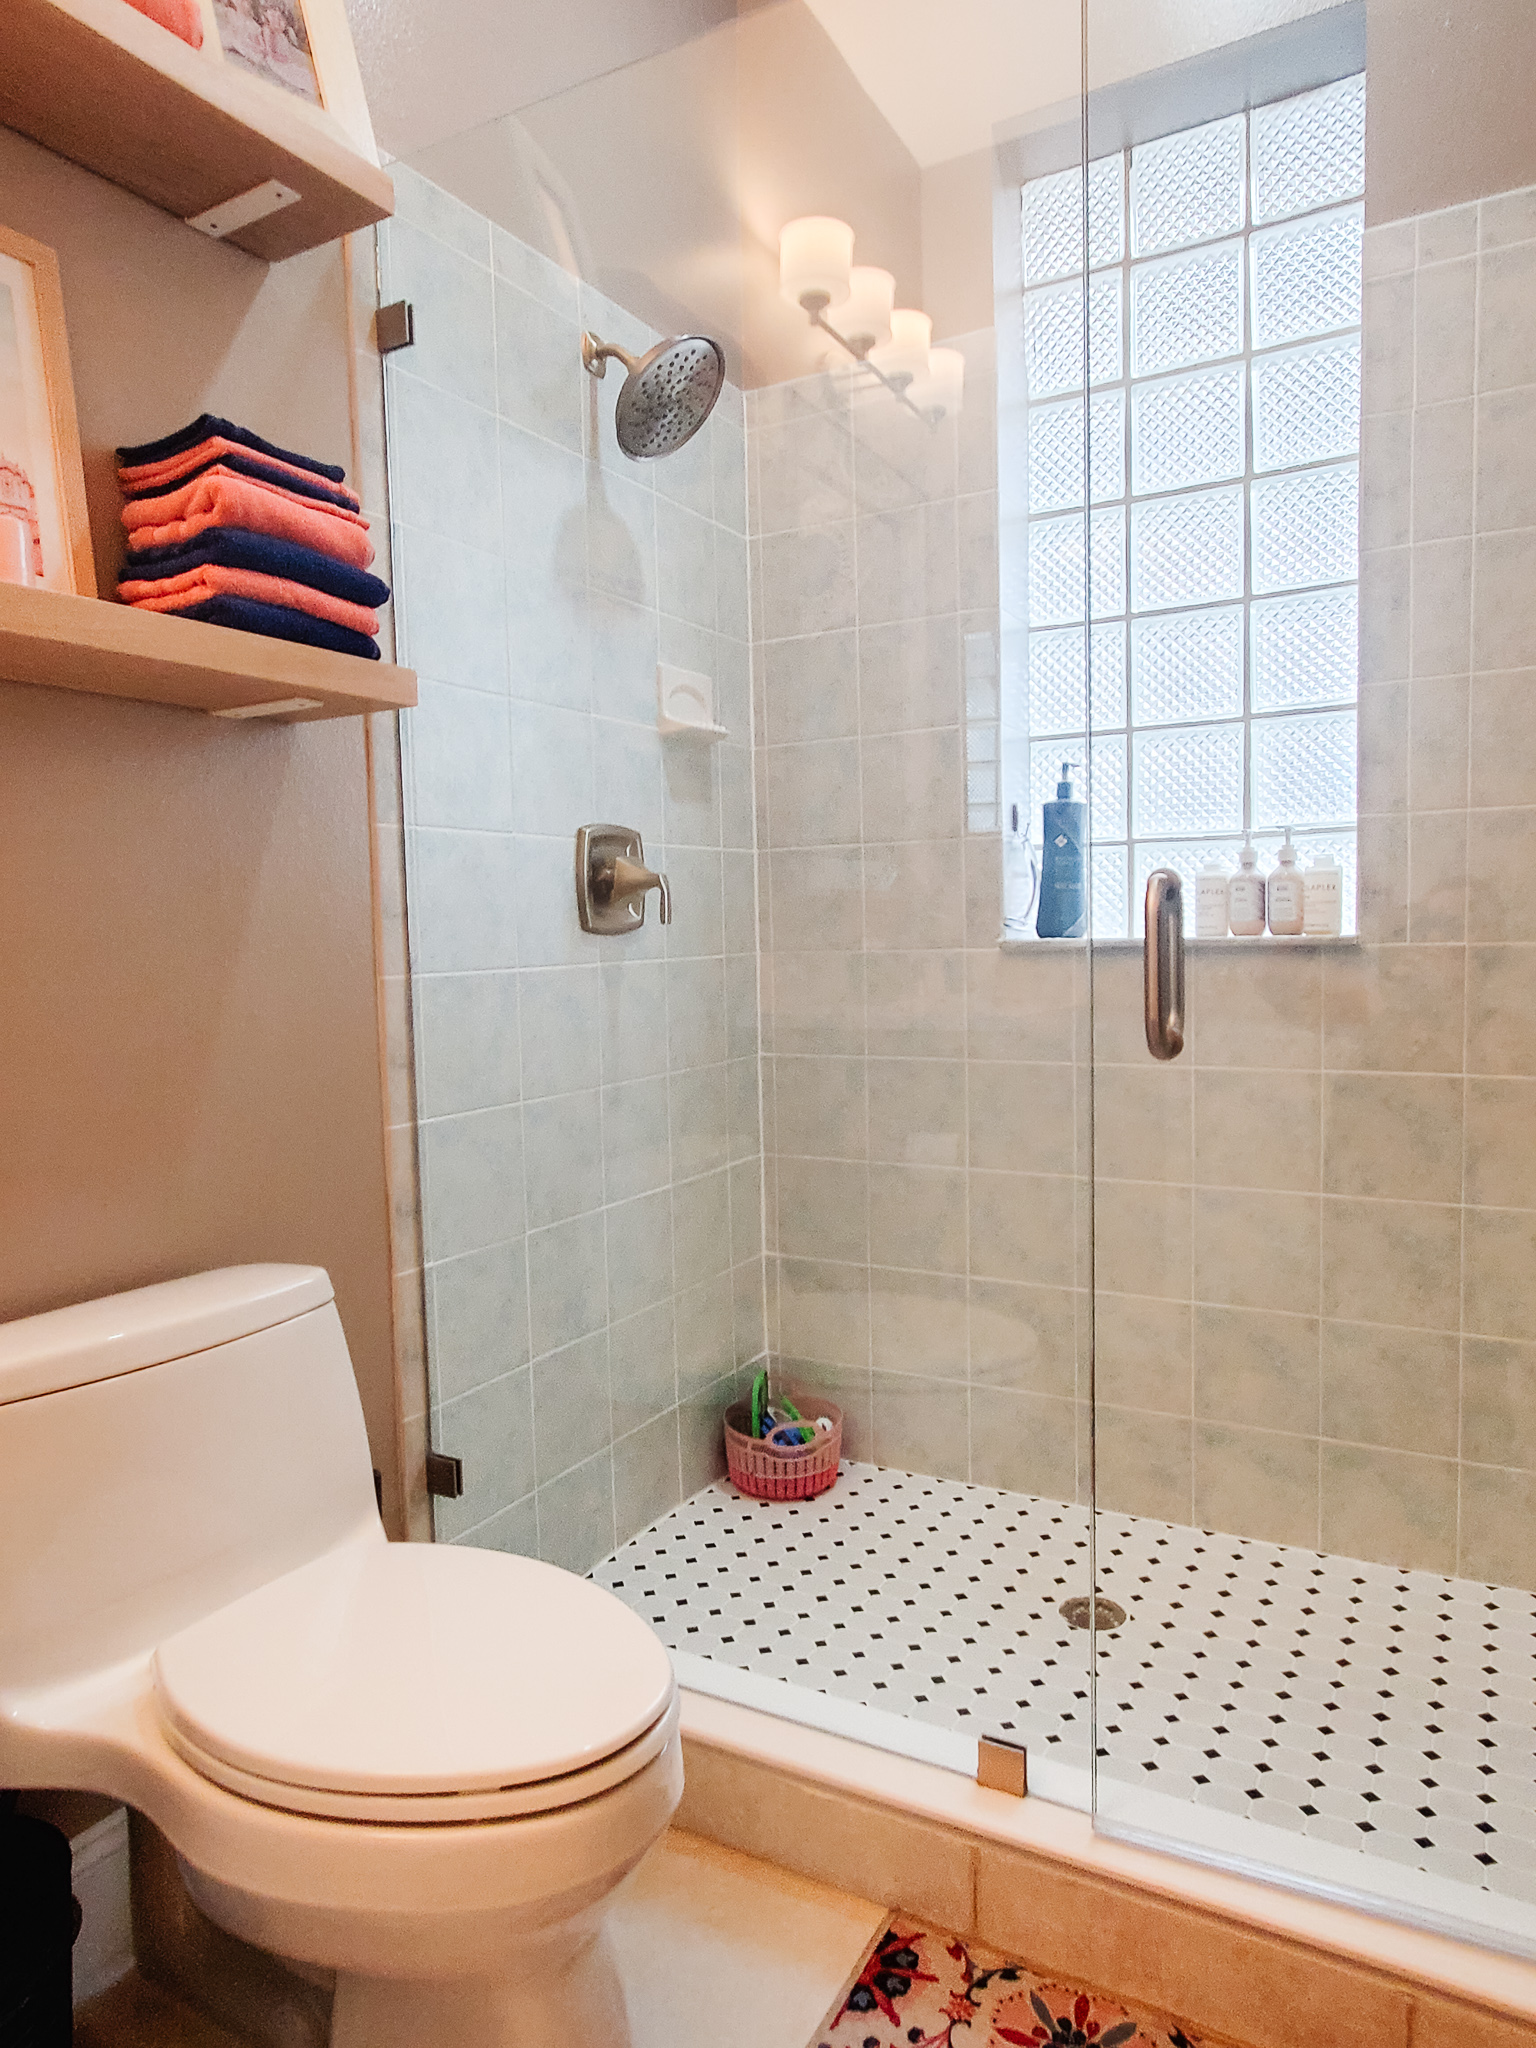
Early on we decided to keep the existing wall and floor tile. The cost associated with replacing these was simply not in the budget. We priced out a professional deep clean, but after successfully testing some DIY options the homeowners ultimately saved a few hundred dollars cleaning the tile and painting the grout themselves.
The homeowners also replaced all the plumbing and light fixtures on their own. While even minor plumbing and electrical work should always be handled with special care, these are great tasks to DIY. Next, we chose a new Trim Kit for the exsisting Moen shower valve versus a full replacement- refining the shower system to a sleek design and decreasing visual clutter. Utilizing trim kits requires special attention to matching the type of valve to a compatible trim, however this decision alone can save thousands (plumbing fixture + tile work). Lastly, we purchased a Recertified Delta Faucet stretching our dollars even more.
Rounding out the practical cost saving choices is one of my all time favorite ways to maximize a budget- remnant countertops (learn more in SOTW-Stone)! This remnant quartz counter came in at less than half it’s typical cost simply because it was a remnant- a leftover small piece of a larger slab. The material was the perfect choice in color, durability and maintenance for this space- not to mention it was at a great price.
This is where practical provides freedom. A handful of careful decisions set a foundation allowing choices that are special, upgraded, and pack a real punch. Let me pause here to point out that none of our practical choices compromised quality. None opted for off-brand fixtures or short-cut a proper install. This is the power of making decisions carefully.
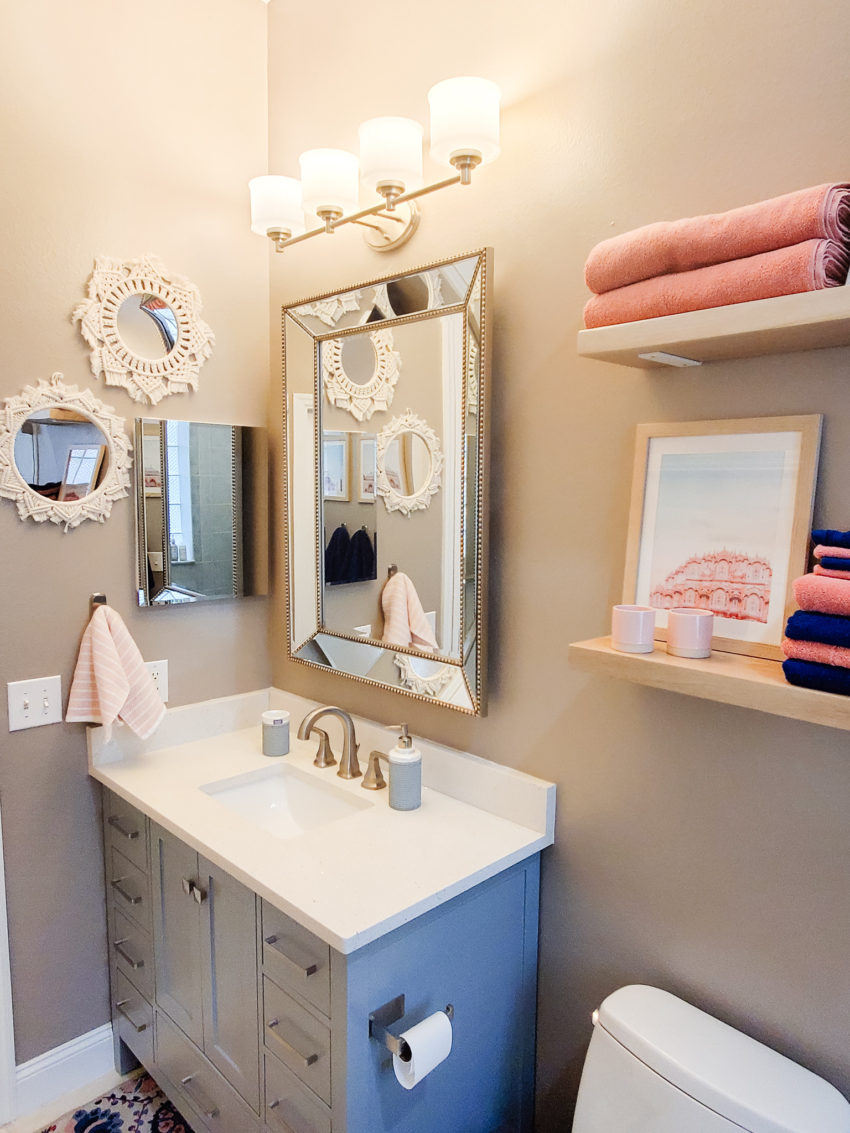
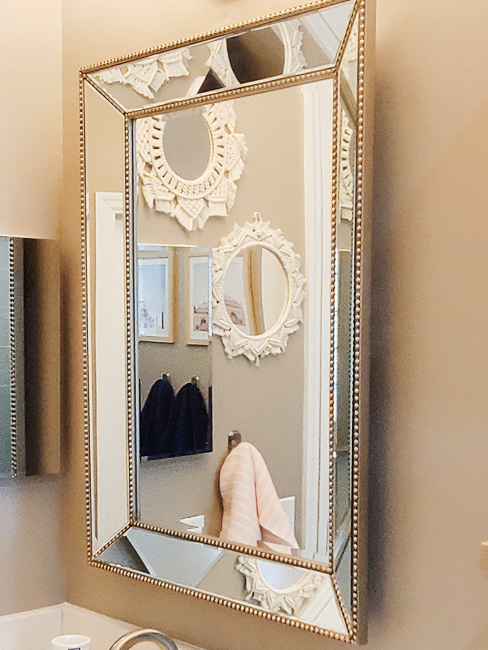
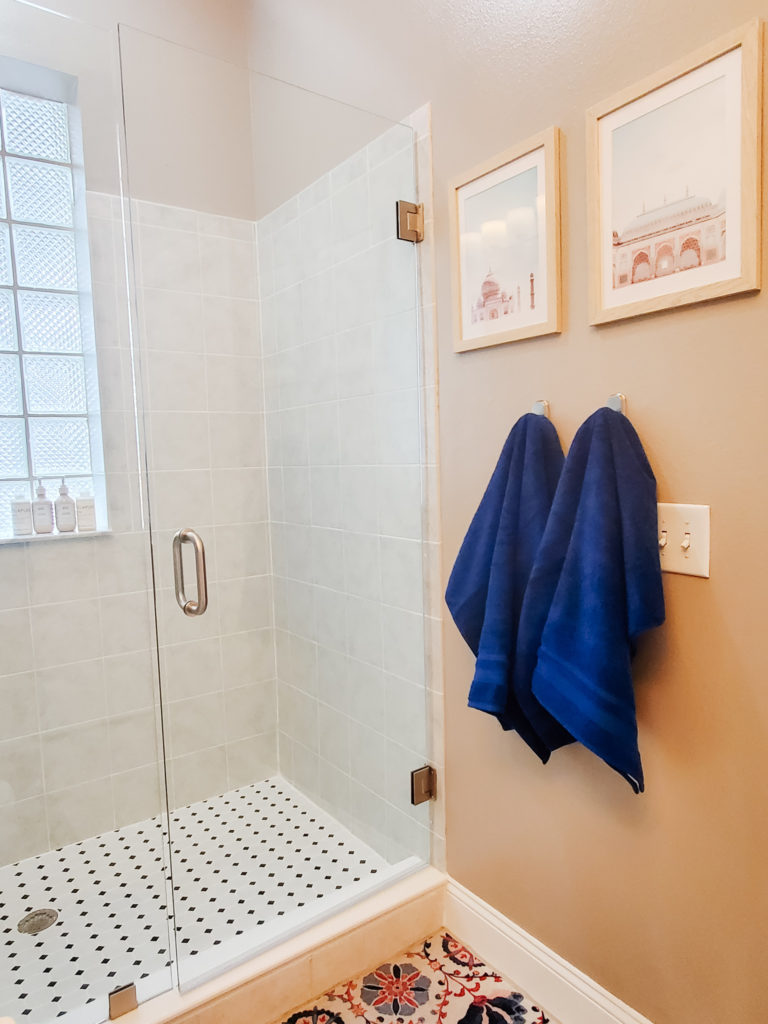
The remodel plan also included replacing the vanity, mirrors, hardware, and after scrubbing the numbers, replacing the current framed shower door with a new frameless design as well (which reduced the visual “pollution” in the room even more).
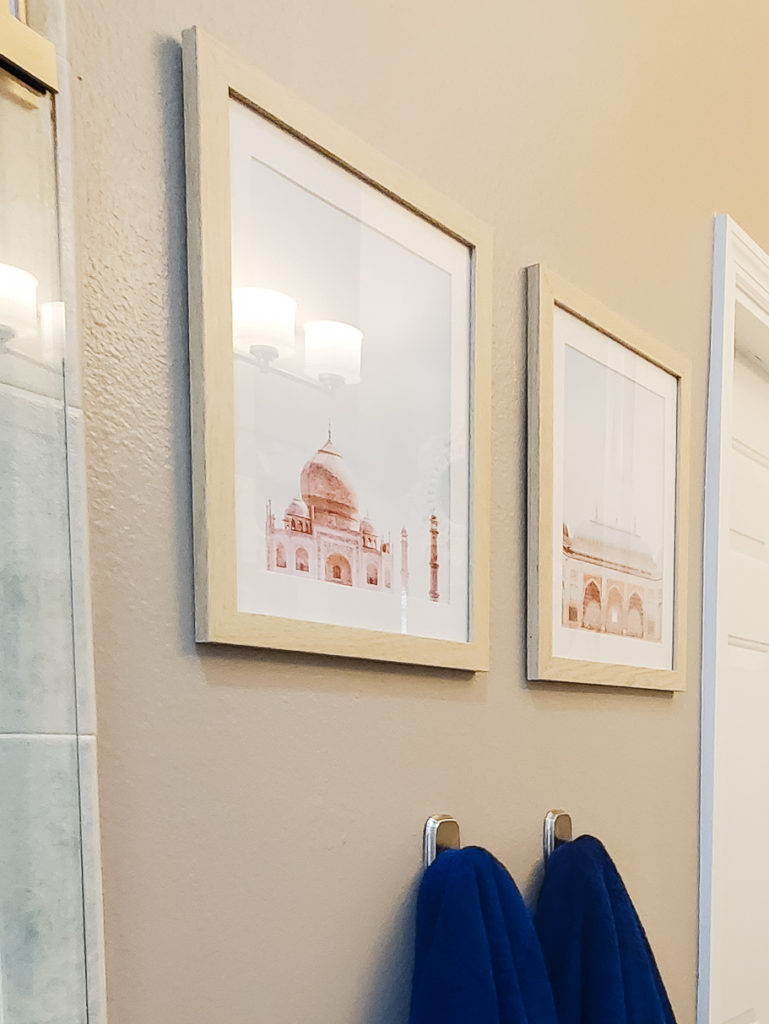
Of course, since we were intentionally mixing existing and new materials, we needed a design concept that would blend all these items into one beautiful finished result. The concept itself centered around a trio of architectural photos sourced from Etsy that were the perfect colors and vibe and provided a nod to the girls’ heritage. I love finding items like these. Sure, there are loads of art that would be pretty or the right colors, but these were more than that because of a personal connection to the subject matter. This specific set was feminine without being girlie or childish and they had the just the right touch of blue to connect with the existing shower tile.
From here we chose Sherwin Williams Perfect Griege for the walls to warm up the room a bit and a similar pretty pale oak tone for the DIY custom framed art and floating shelves. Yes, I said DIY and custom. They really were both- back to that in a moment. We were carefully bringing materials with warmer tones and textures into the room to both modernize and soften the space. One trick to really making a design feel cohesive is connecting items together in a unobvious (aka, not matchy matchy) way. Here we did it with the warm undertones in nickel hardware, the varied colors in a light wood grain, natural fibers and my personal fave- a delicate champagne finish around every bead of the phenomenal beveled mirror. Together they deliver a glowy almost etherial vibe. A girls bath, that’s not too girlie. Youthful, but sophisticated. Warm and modern. A work-horse of a bathroom that is packed with easy to maintain features that keep life organized while simultaneously disappearing. It’s practical AND beautiful.
Let’s unpack the work-horse for a sec- this bathroom had to have some serious function. 2 young girls have hair ties, brushes, products, swimsuits, soaps, cutie patootie towels and coverups, and on and on. We were already in a pinch without dedicated linen closet and limited storage in the rest of the house. Meaning this bath also had to have a home for kiddo medicine/first aid and linens. Whew!
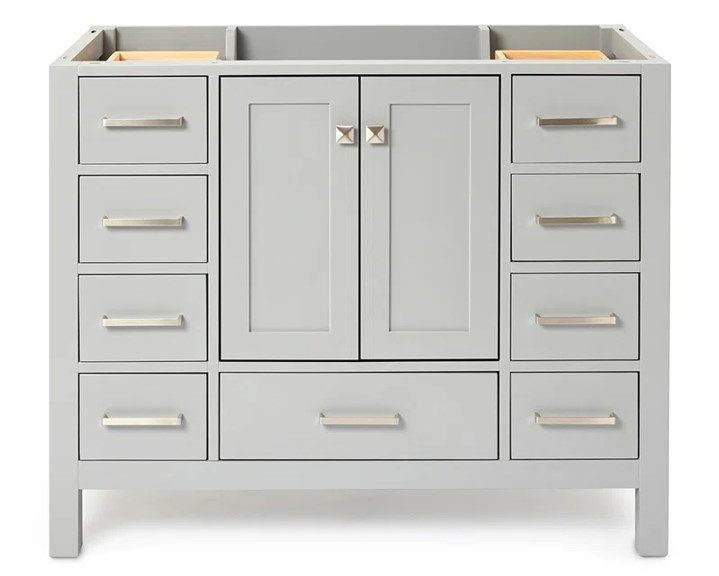
We invested in a high quality single sink vanity with left and right stacks of drawers (one for each little lady), a good-sized central cabinet and a wider, bonus lower drawer. This vanity is sold through lots of sources in difference colors. We purchased ours through Wayfair where we got the best price and the color we wanted was in stock. Buyer beware however, get into the details of your vanity construction. Check the specs! Check the weight! Check the reviews! Understand how it is put together. You will find many versions that are similar to other vanities at lower prices. You must get into the details to determine if what you’re buying is well made or not. We had to have quality here and we got it.
We also “invested” in a variety of hooks. Folks, if you have little people in your home and you’re hoping to keep the pjs, towels, swimsuits off the floor- get them hooks. You’ll always be more successful with a hook over a rod or a ring (this is true for big people too). We placed them by the sink for hand towels, near the shower for in-use bath towels and even hidden behind the door for swimsuits and those adorable cover ups. This typical-sized bathroom has homes for SEVEN hanging things not including fresh towel storage. Can your rod and ring do that? By the way, all together, they cost about $30.
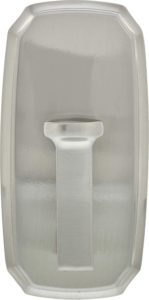
These hooks from High & Mighty are legit. They hold up to 25lbs, require NO TOOLS to install and are super affordable. Get them on Amazon!
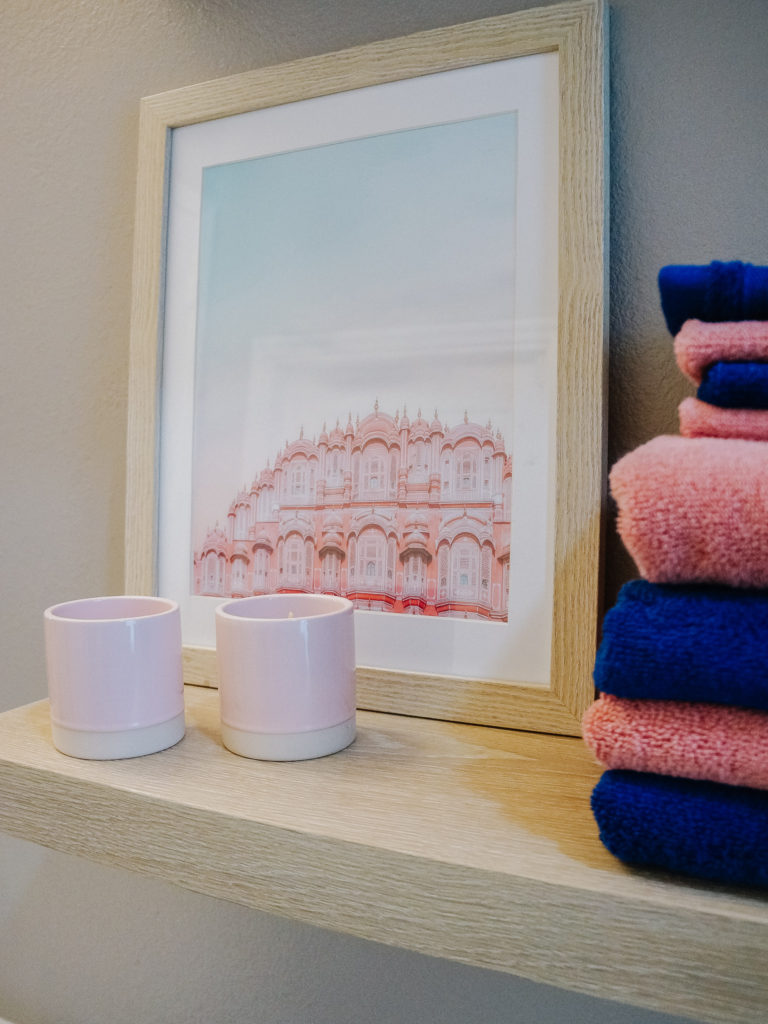
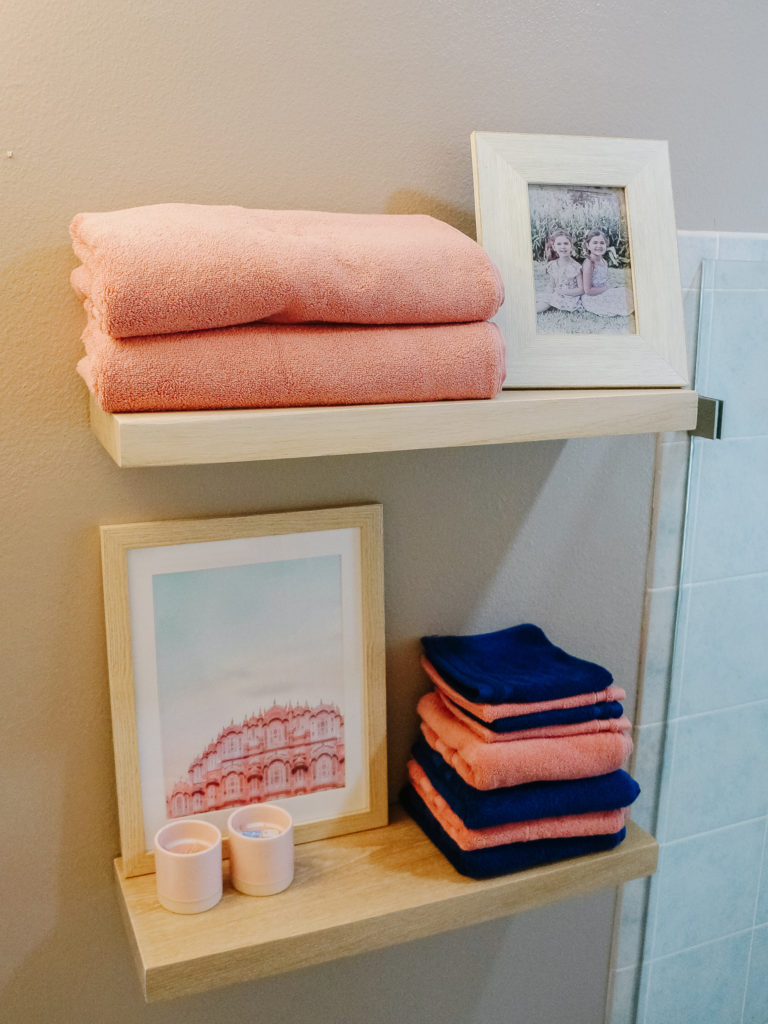
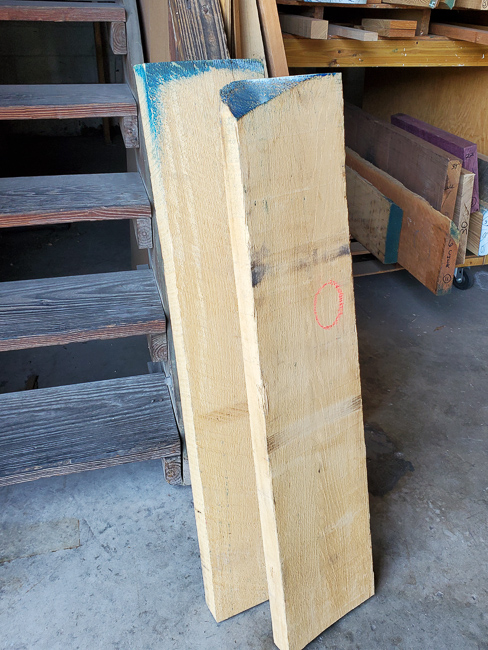
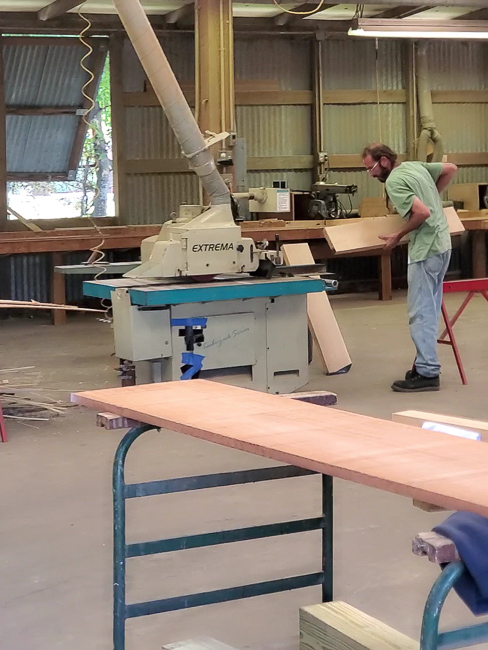
Next we went into deep contemplation on floating shelves… maybe it’s just me (good chance of this), but there is a lot to contemplate here. Floating shelves aren’t cheap. At least not good ones. Especially when they are entirely floating (no left & right support walls)… especially when they are not just decorative (ours had a job to do)… especially when you must have superior construction (hello, kiddo bath?). I knew we could get the best quality product in exactly the right size and wood species (rustic finished pine was not going to fly in this bathroom), for the best price if we just built them ourselves. Easy peasy! EXCEPT, I am not a carpenter and neither are my clients. I am however, fueled by an obsession with value and thoroughy convinced that I can find a better solution if I just keep searching. Ultimately, we had solid white oak MILLED to our custom size and length specs at a legit lumber yard. Can I just tell you how cool this was?!? The grain on these things is amazing. The way they took stain and poly so perfectly creating that magical unfinshed-even-though-it-is-finished color. Muwah! Perfection. Oh, by the way, they are the official home for fresh towels and washcloths. Mounted proudly (with heavy duty L brackets because they are SOLID) above little people height so mom can distribute the fresh towels at her own discretion. That’s how custom meets DIY you guys. Full disclosure: it did take some careful finishing to get the color just right on these, but it was completely worth it. Full post with details to come!
Our other little custom DIY project was the framing of our design inspiration artwork. I love a beautiful matted and framed anything, but lets be serious, unless your art is in the perfect dimensions (and it seems the coolest stuff is not), you have to go custom and that costs a small fortune in framing and matting. I’m going to share a secret here that may change your life (okay, I may be writing under the influence of too much caffeine): you can mat your own stuff and save a ton of money. A ton. Also, there are MANY options for lovely gallery style frames at Michaels and Amazon that are a fraction of the designer versions’ cost. We paired these (my faves for kiddo spaces because they’re lightweight and the larger sizes come with shatterproof plexi instead of glass- so much safer) with mats I cut myself from full sized mat boards using this handy and affordable tool (go slow and you’ll do great). Viola! Custom DIY artwork.
The Bald Eagle Run Girls Bathroom project is the perfect example of why practical is powerful. Beginning a project with practical choices clears the way for magic to happen. For beautiful things to become tremendously productive, for value to soar and ultimately for a home to support those who live in it.
Here’s to a better remodel: more beautiful & economical with less stress!
